Organizational Units are groups consisting of a set of users who belong to a specific functional unit. In the Infince Workplace, creating organizational units and associating users with them is possible. Each organizational unit is associated with three system default roles: Organizational Unit Member, Organizational Unit Admin, and Limited Access Member.
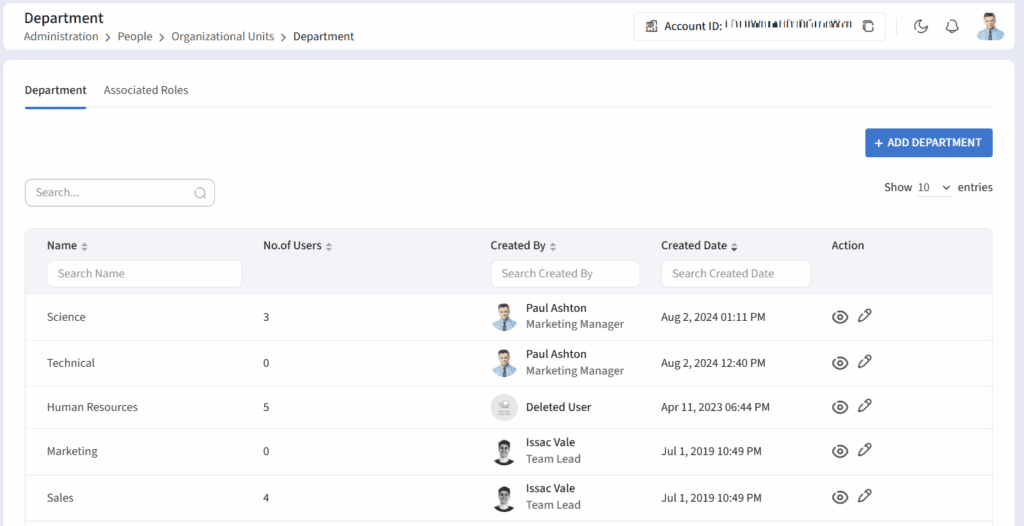
The organizational units created under each organizational unit level through the ‘Organizational Unit Setup’ will be available under the People menu. For instance, if your organization has Departments and sub-departments, you can create departments (e.g., Finance) and sub-departments (e.g., Payroll, Procurement) on the Organizational Units page (Administration > Settings > Organizational Units). Then, click on Administration > People > Department to access the Department page. In this page, you can view the list of Departments and the list of Roles associated at the Department level.
Viewing the OU
Within the OU page (e.g., Department), the page with the list of OUs (Sales, Finance, etc.) displays the OU details such as name, number of users associated with the OU, creation details, and the actions that can be performed for the OU. It is possible to edit the OU details, and view the associated users and sub-departments for this OU.

Adding OU
- Click on the Add button (e.g., Add Department) to create a new OU.
- In the ‘Add’ pop-up, enter the name and description of the OU. E.g., Administration, Sales, etc.
Editing the OU details
- Click the ‘Edit’ icon against the OU to edit the details. In the ‘Edit’ pop-up, edit the name and description of the OU.
View the OU details
In the OU details page, the users can view the lists of associated users and sub-level OUs of this OU.
Viewing users associated with the OU
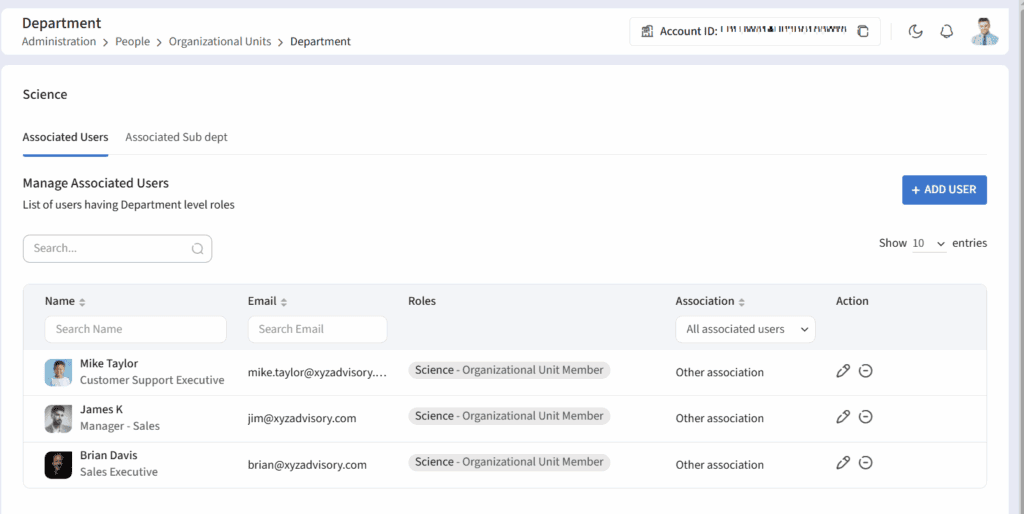
Click on the OU name or on the View icon against the OU to view the users associated with the OU. The user name, email id, the role the user is associated with, association details, and actions that can be performed for this user. Editing the user’s role and removing the user from the OU can be done here.

Adding users to the OU
- Click on the Add User button to add a user to the OU.
- In the ‘Add User’ pop-up, select a user role, provide user names and click on the Submit button to provide access to the OU.
Note: To add a user as a member of the organizational unit, Belongs to association should be mapped from the user profile.
Editing the user role
- Click on the Edit icon to edit the user’s role.
- In the ‘Edit Role’ pop-up, you can delete the user role and add a new role.
- Click on the Add Role button to assign new roles for the user.
View the user profile
Click on the user name in the ‘Associated Users’ tab to redirect to the user profile page.
Removing the user from OU
To remove a user associated with the OU, click on the ‘Remove’ icon.
Associated Sub Level OUs
Adding sub-level OU
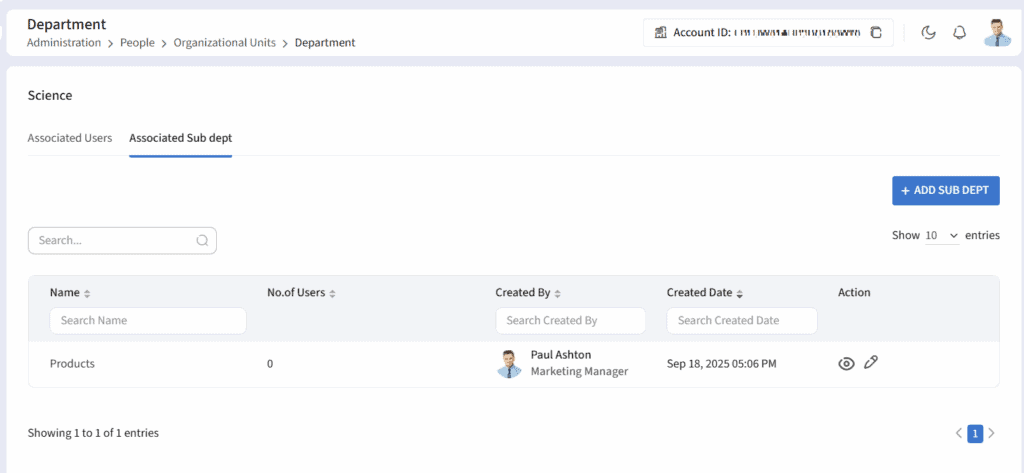
In the Associated sub-level OU tab (e.g.,‘Associated Sub Departments’), click the Add button to create a new sub-level OU.

In the ‘Add’ pop-up, enter the name and description of the sub-level OU. E.g., Housekeeping.
Note: It is possible to edit the sub-level OU, view the OU and add users to the sub-level OU.
Viewing the Associated Roles of an OU Level
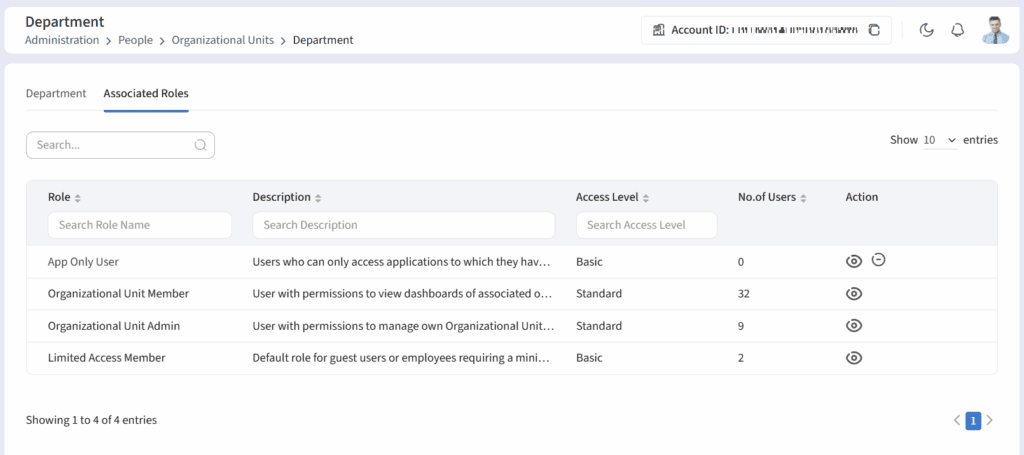
The Associated Roles tab within the OU page displays the role name, description, access level, and the number of users associated with this role. Click on the User count to view the users for the role and can also remove the role from the roles list.

Click on the ‘View’ icon to view the users and groups associated with this role.
Delete Associated Role
Click the Remove icon against the custom role in the Associated Roles tab to remove from this OU level. Remove icon will be displayed only for custom roles.
Organizational Units in Infince provide a structured way to represent your organization’s hierarchy. They enable efficient user grouping, role assignment, and access management, ensuring streamlined administration and effective collaboration.