In InfinCE, you can define the structure of an organization using the ‘Manage Organizational Units’ feature (Organizational units referred to as ‘OU’). Click on the Administration > Settings > Organizational Units to access the ‘Manage Organizational Units’ feature. The default organizational unit levels will be displayed in a tree format on the left side of the page. The default structure consists of a root-level organization and department sub-level.
You can create as many sub-levels as required for the root level(Organization) and the same level/sub-level for other levels. This allows you to easily build your organizational unit structure in any required format.
You can then add organizational units for each of these levels. E.g., Divisions can be the first sub-level under Organization and Departments can be the sub-level under Divisions. For the Division and Department levels, the actual Divisions and Departments can be added and managed on the right side of the page. Deleting the default root Organization level available in the system is not possible.
Note:
- You can rename the OU levels based on your organization’s requirements.
- If the default OU structure is not suitable for your organization, you can set it according to your needs. After selecting the OU level on the left, you can create the sub-levels in the tree format and add their values on the right side section. You can add associated users and sub-OUs in each OU as required. Details are covered in the rest of the article.
Setting the Organizational Unit Levels
Editing the root OU level
Click on the menu icon on the root-level organizational unit.
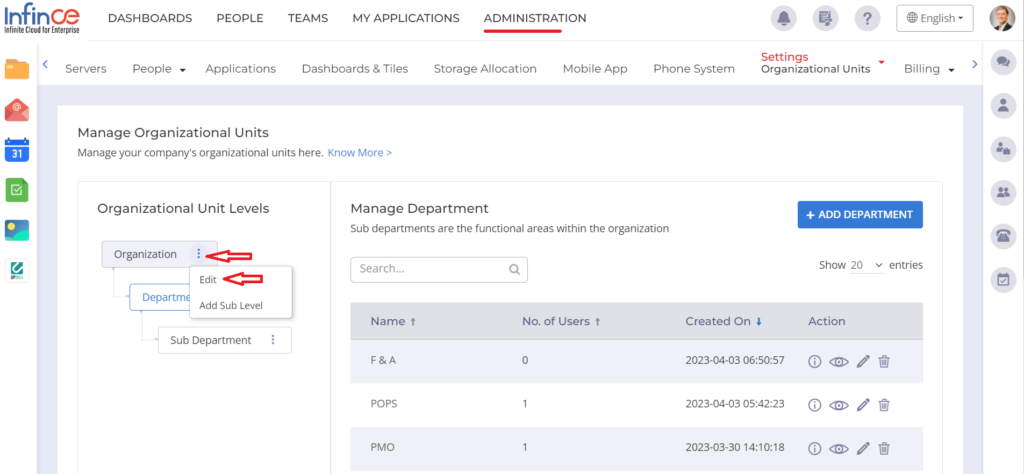
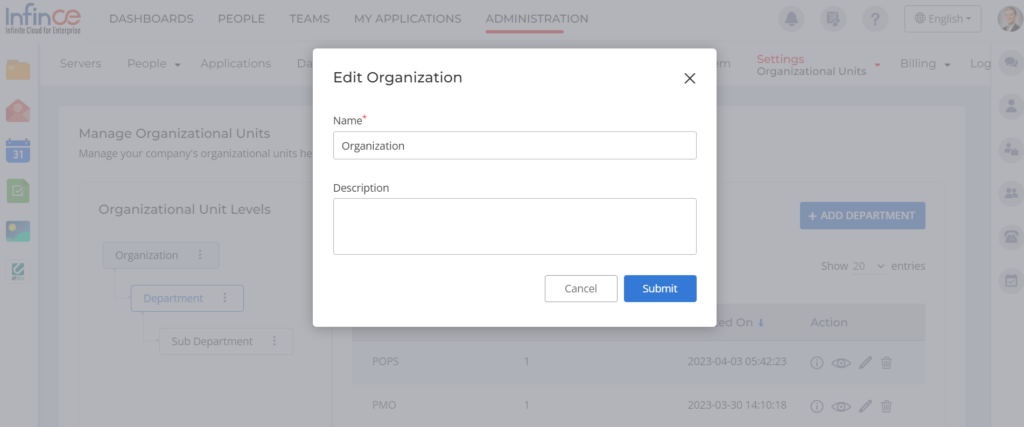
Click on the ’Edit’ menu to edit the name and description of the organizational unit.
Adding sub OU Levels
Select the root-level organizational unit and click the ‘Add Sub Level’ menu to add a sub-level under the root level.
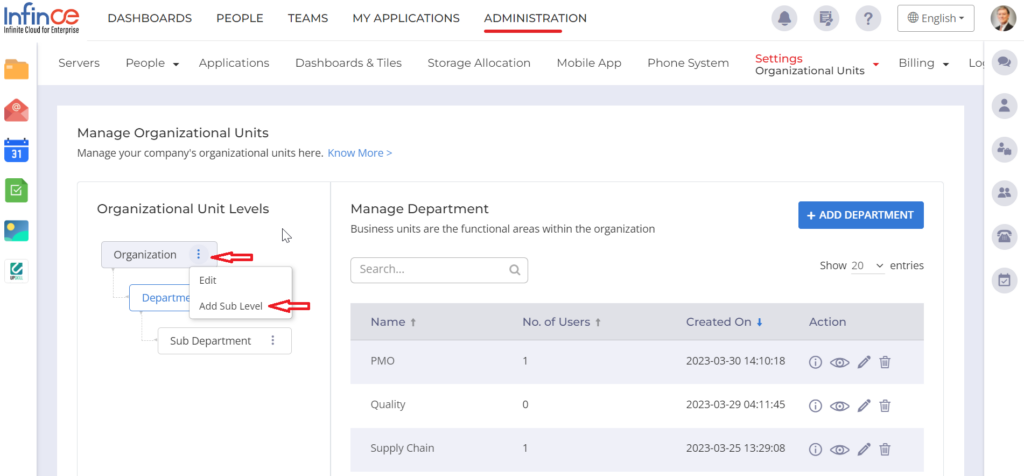
In the ‘Add Sub Level’ pop-up, enter the name and description for the sub-level and click on the Submit button to save the changes made.
Similarly, you can continue adding as many sub levels & same levels as required to complete the required structure.
Adding same OU Levels
Click on the menu option of any organizational unit level (other than the root level) and choose the ‘Add Same Level’ option.
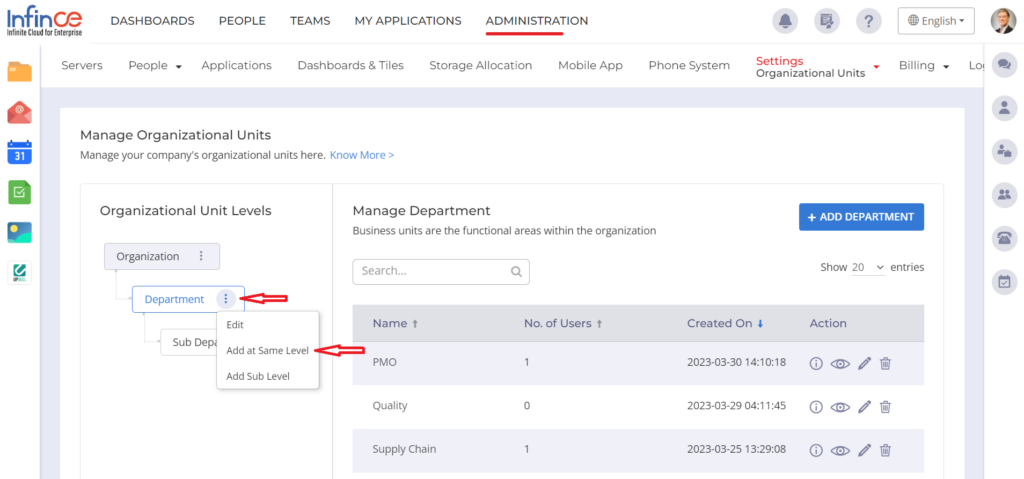
In the ‘Add Same Level’ pop-up, enter the name and description of the OU level.
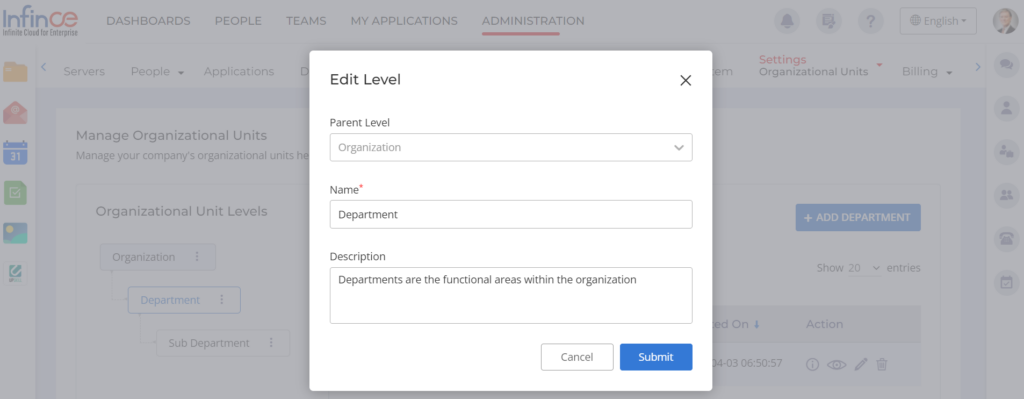
Editing an OU Level
You can edit the name and description of any OU Level, including the root OU Level. Click on the ‘Edit’ option on the menu to edit the name and description of the Level.
Deleting a OU level
Click on the ‘Delete’ option in the menu against the OU Level to delete it.

Managing Organizational Units
Click on any OU level to see the OUs created at this level. The OU name and the number of users associated with this OU will be displayed. The actions that can be performed can also be viewed.
Adding OUs
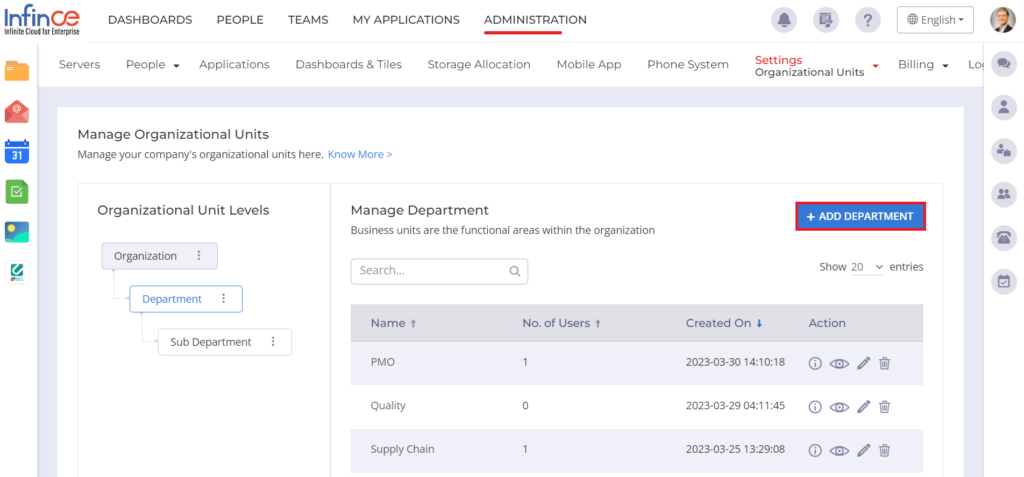
- Click on any level (other than the root organizational unit level) on the left panel and click on the Add OU button to create OUs(E.g., ADD DEPARTMENT to create departments)

- Enter the name and description of the OU in the pop-up (E.g., Name as “Facilities And Administration” in the ‘Add Department’ pop-up).
Viewing the OU Info
To view the details related to the OU, click on the ‘Info’ icon against the organizational unit name. The description(if any) and the employee who created the organizational unit will be displayed.

Editing the OU details
Click on the ‘Edit’ option in the menu to update the name and description of the organizational unit.

Viewing the OU details
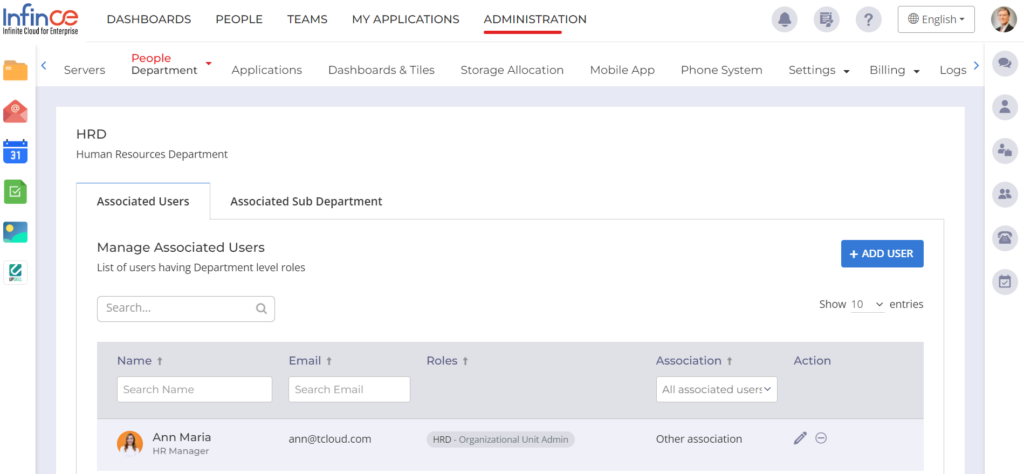
Click on the ‘View’ icon or the ‘Name’ of the organizational unit to navigate to the Organizational Unit page (or navigate directly; for e.g., Administration > People > Department) to view the users and sub-level OUs associated with this organizational unit.
Deleting the OU
To remove an OU, click the ‘Delete’ icon next to the OU in the listing. OU can be deleted only when it has no sub-levels or users associated with it.
