Do you wish to run email campaigns for your customer base? Or, are you looking for an efficient tool to manage your Customer Support? Perhaps you are already using an application that you wish to integrate to InfinCE through single sign on. InfinCE can help you through all these needs with the click of a button.
InfinCE provides you a growing list of applications to manage your business effectively on a low budget. Take advantage of numerous productivity and enterprise applications, including ERP, CRM, CMS, and HRM solutions, hosted on secure cloud environments, dedicated to your need.
Installing a new application on InfinCE
Only users with Administrative privilege have the permission to purchase/install new applications.
To purchase and install a new application, go to the Administration tab. Click on the Apps > App Marketplace.

Various Business applications will be listed in the page. You can use the search bar to find the desired application. Click on “MORE INFO” to view the details of the application. Review the application features and click ‘Buy’ to initiate the purchase.
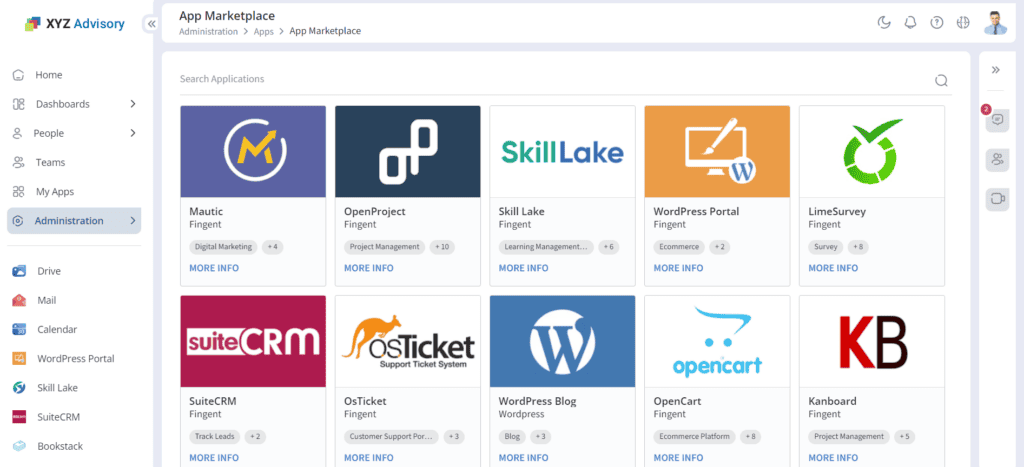
List of applications in InfinCE
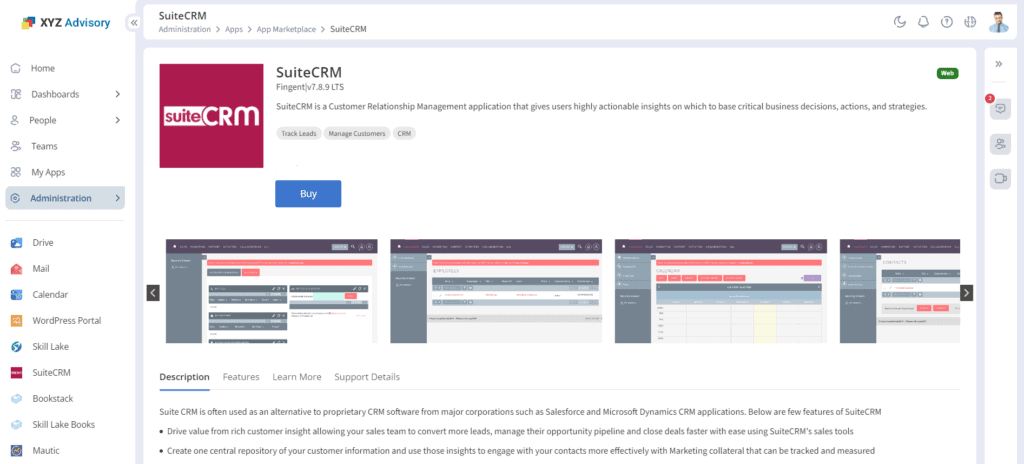
Review Application features and screens. Click on “Buy” to initiate the purchase.
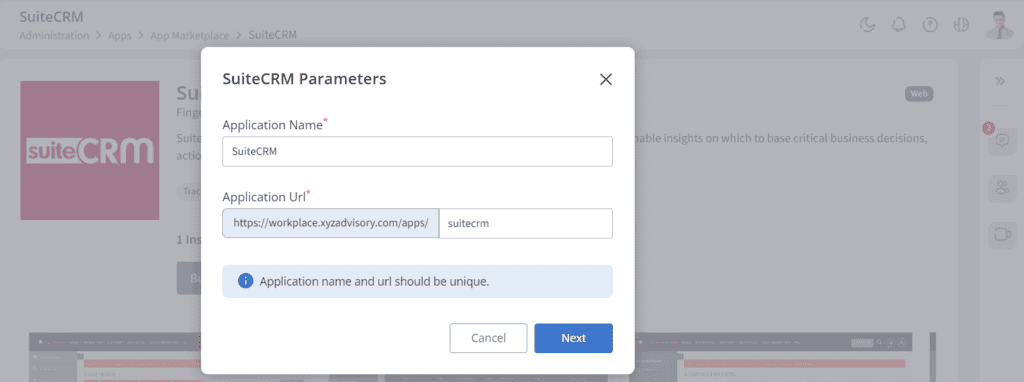
In the ‘SuiteCRM Parameters’ pop-up, the application name and application URL will be displayed. Click on the “Next” button to view the plans and pricing for the application.
The plans and pricing details for the Application will be shown on a pop-up.
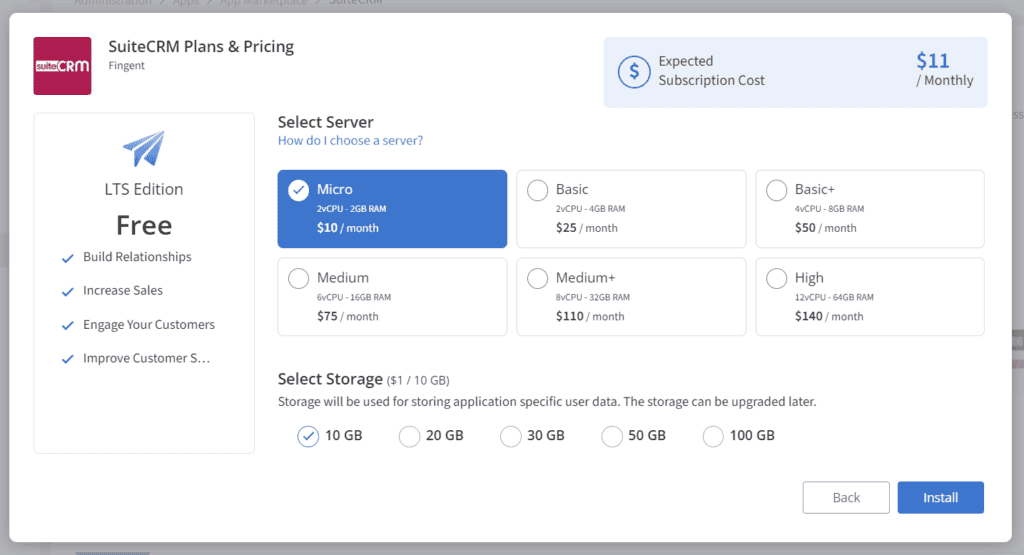
From here, select the server configuration required to host the application. Here are few factors to consider while choosing the server. By default, the system would only list those flavours that are can support the chosen application. Consider your storage & usage requirements to choose the storage option and finally click on ‘Install’.
At any point, if you have queries about the right flavour or storage, refer Manage Application Storage and Servers.
The installation is usually complete in few minutes. You can view the status on Administration -> Servers tab.
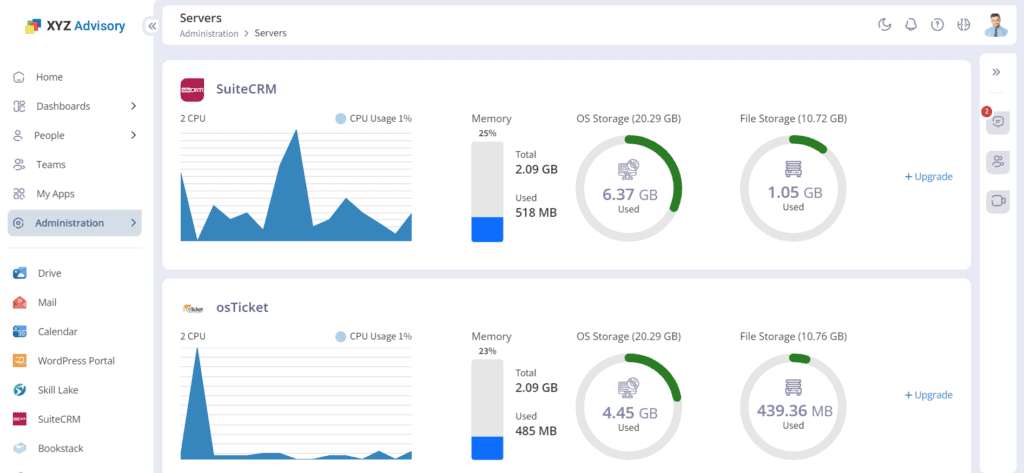
The Administration > Servers page would show the status of the Application Server being set up
Once the server is up and running, you can go back to the Applications -> Installed Applications tab and click on ‘MANAGE’ to provision users for this application.
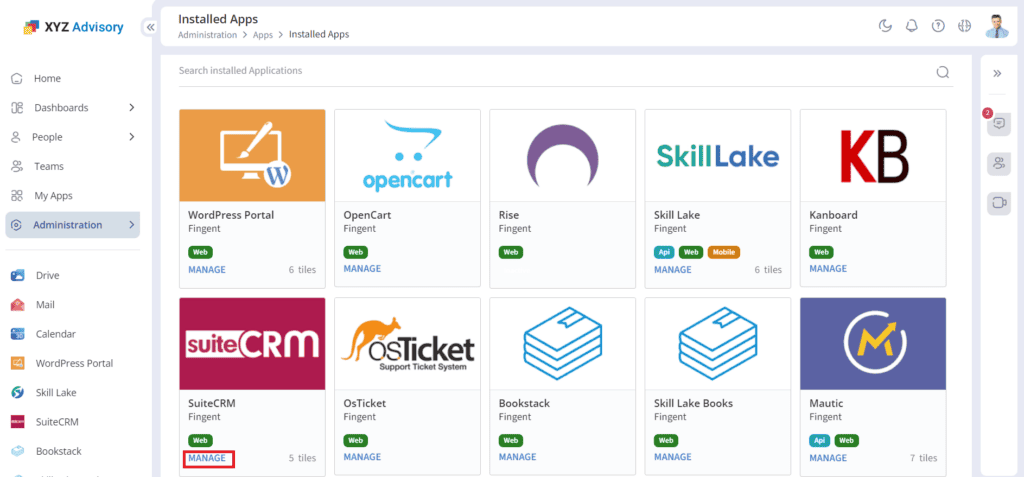
Click on “MANAGE” to control the access to the Application
Provisioning users on a business application (Assigning roles for employees on business application)
Click on Administration > Apps. The list of business apps installed already will be listed on the “Installed Apps” menu. Click the “MANAGE” link on the desired application to provision or un-provision users.
On the “Provisioning” Tab, all provisioned users will be listed.
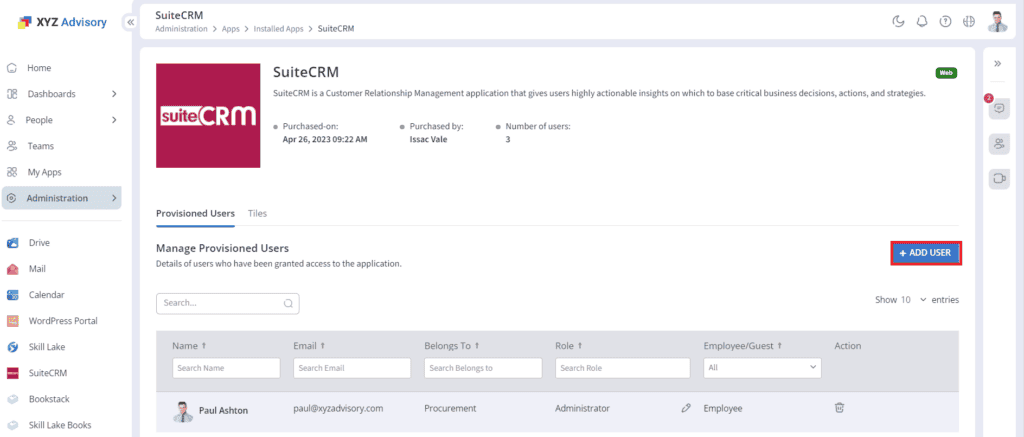
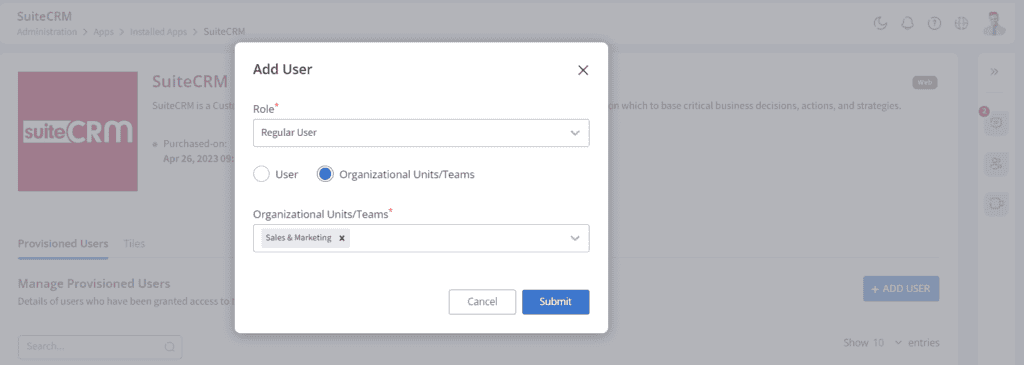
Click on the “Add User” button to add users to access this application.
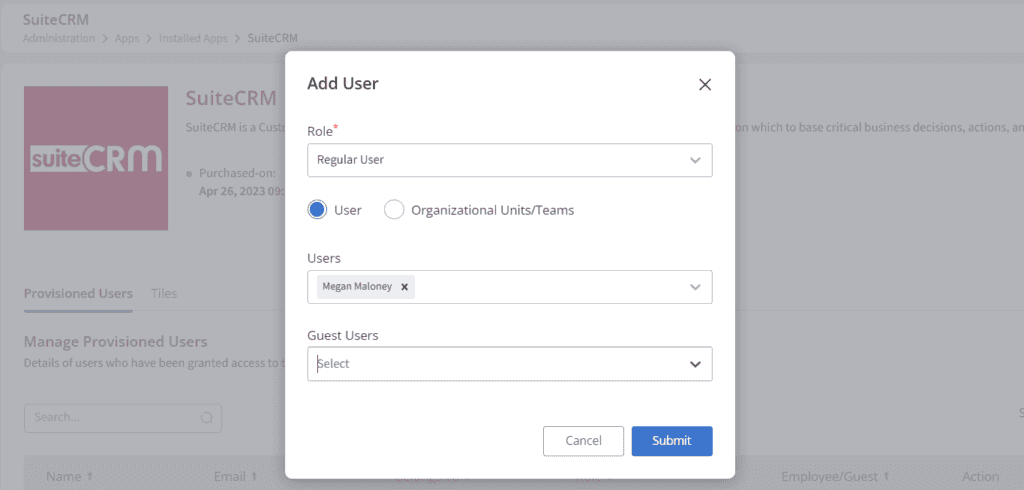
In the pop-up, select the desired role, choose whether you want to add a user, team or organizational unit who need the access.
If you choose Organizational Unit/Team, then select the organizational unit/team whose members need access to this application.
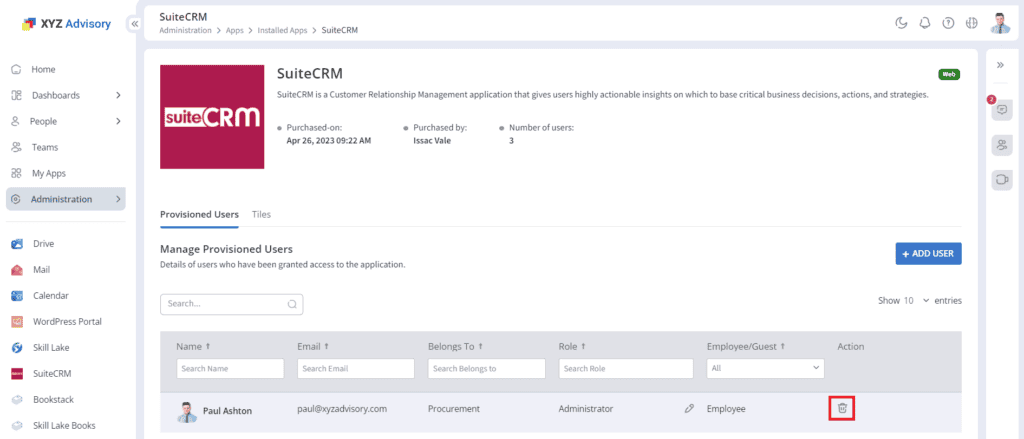
Remove provisioning for users
To remove access to already provisioned users, click on the “delete” icon against that user in the list.
Requesting for a Custom Application
If the application you are looking for is not listed in the Marketplace, or you have a custom requirement, scroll down on the Marketplace (Administration -> Apps > App Marketplace).
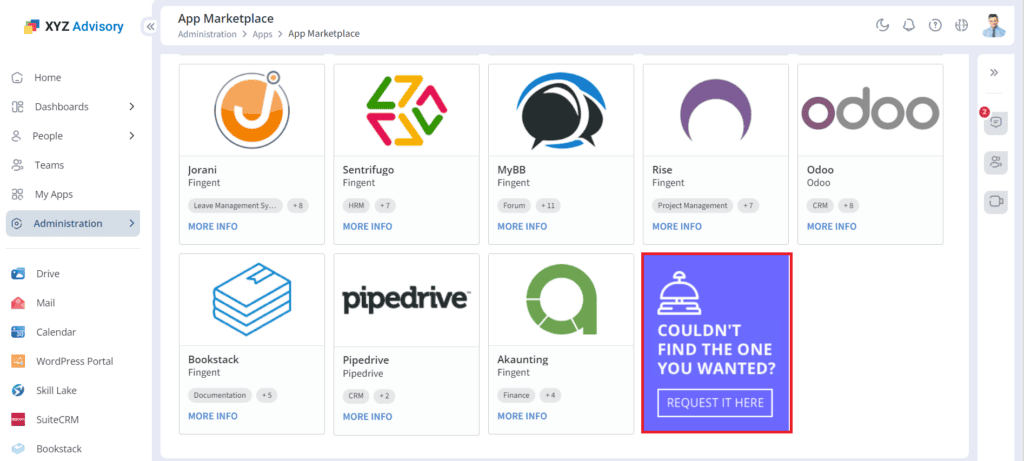
Click on this card to request for your custom application requirement.