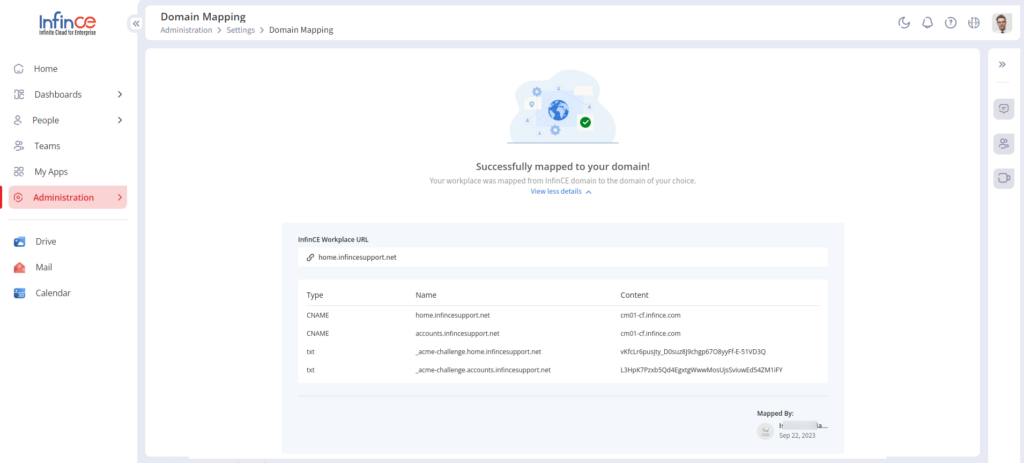
Domain mapping allows you to take corporate branding of InfinCE to the next level, by white-labeling your Workplace URLs. For e.g., If your business domain is xyzbiz.com, your default InfinCE URL would be ”https://xyzbiz.infince.com”. Instead, if you map InfinCE to your own domain with sub-domain as ”portal”, your new InfinCE URL would be “https://portal.xyzbiz.com”. You can choose the sub-domain name during the mapping process.
The time taken for domain mapping is typically 5 to 15 minutes, depending on the number of business applications you have subscribed to. If the process takes longer, please clear your cache and start over.
It is a one-time process, and the users with Administrative privileges can initiate the same. During the process, your data would be safe and continues to remain in your secure server and will not be affected by the mapping process. When the domain mapping is completed, the URLs for InfinCE Workplace, Applications and File share links will change and will be redirected to the new, custom URLs. However, it is recommended to update all your bookmarked URLs to reflect the domain change.
Steps to map InfinCE to your domain
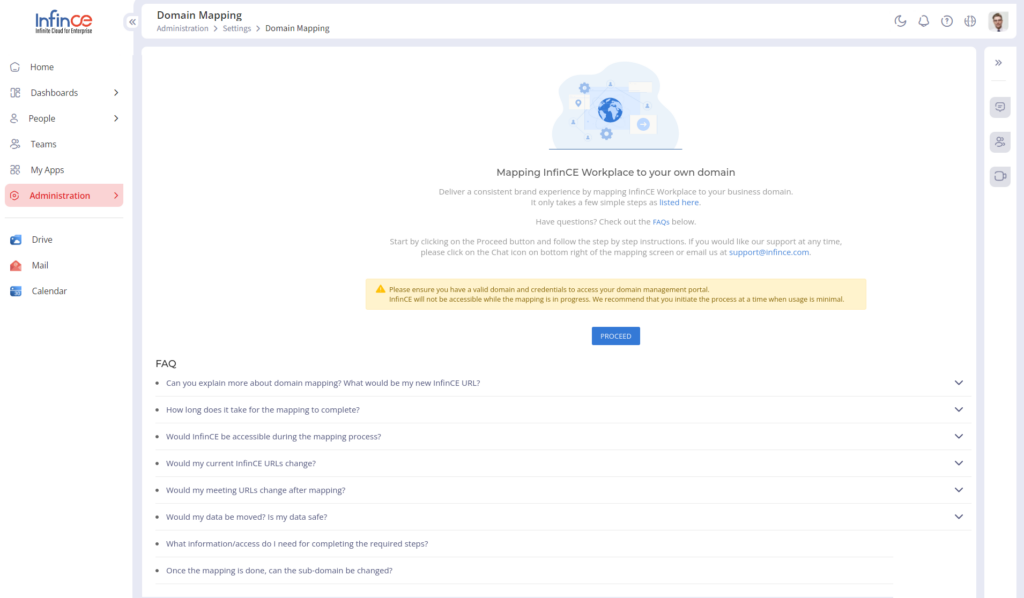
- In your Workplace, click on Administration > Settings > Domain Mapping. To initiate the process, click on Proceed button.
Note:
- Please ensure you have a valid domain and credentials to access your domain management portal.
- InfinCE will not be available while the domain mapping is in progress. Please initiate the process when the usage is minimal.
- You will be directed to the Authenticate/Reauthenticate page, where you need to enter your InfinCE credentials, and click Authenticate/Reauthenticate button.
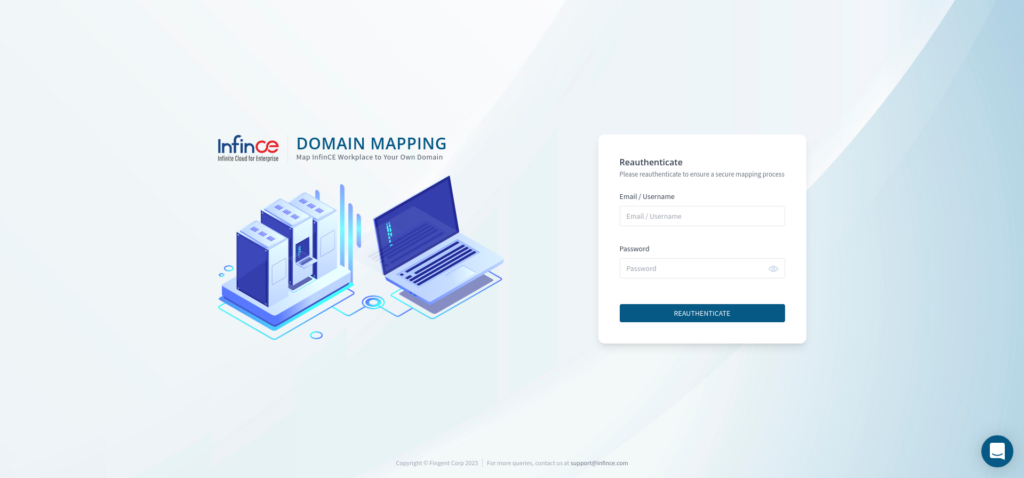
Note: You can also click on the email notification to access/ browse the domain mapper application.
- After successful authentication, you will be redirected to the Domain Mapping page. Domain Mapping is a step-by-step process where you need to provide the necessary details in each step. It involves three steps: Domain Details, Validate DNS, and Domain Migration. In the Domain Details tab, enter your:
- Domain name – The domain to which you want to move to. The domain name will be pre-filled from your InfinCE Workplace.
- InfinCE workplace URL– Enter the sub-domain that should be mapped to InfinCE. E.g:-portal, workplace
- SSO URL – Enter the sub-domain that can be assigned to the InfinCE login page. E.g:-account, auth.
- DNS Provider – Select Cloudflare if your DNS Provider is Cloudflare. Select Others if your DNS Provider is not Cloudflare.
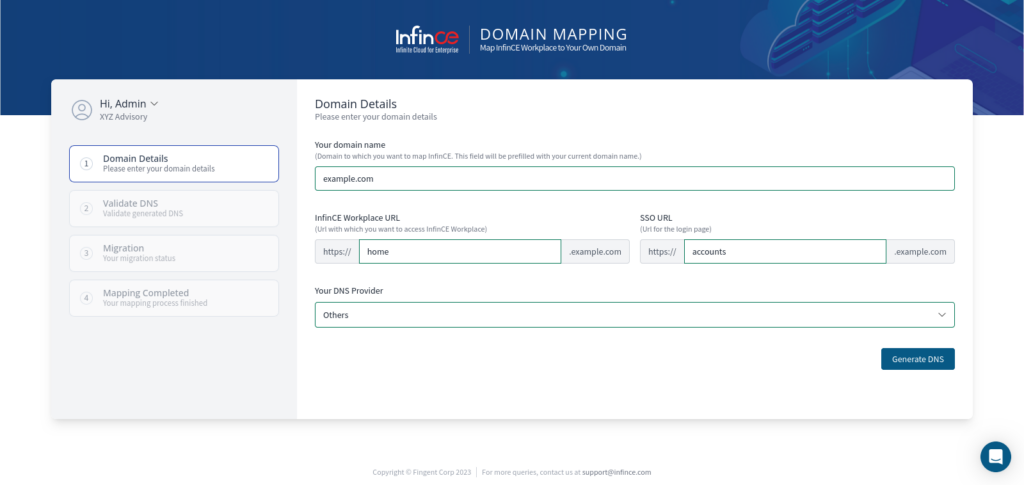
- Once you have provided the details in the ‘Domain Details’ tab, click on the Generate DNS button. You will be directed to the ‘Validate DNS’ section when the DNS is successfully generated.
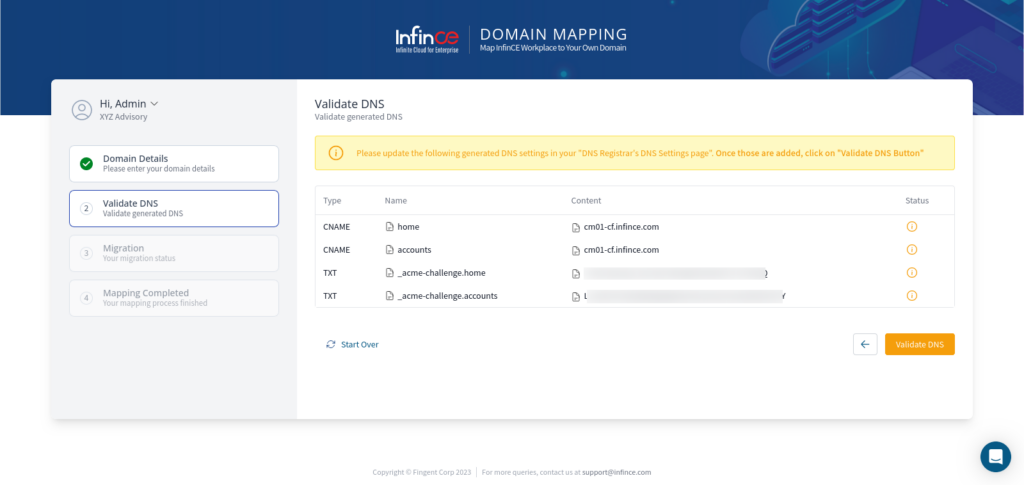
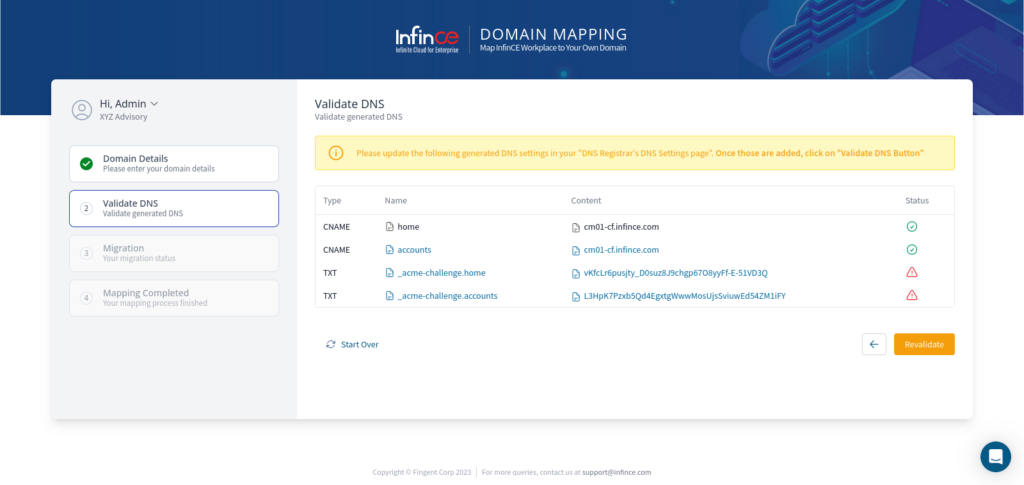
- Add the generated DNS records to your DNS Registrar’s DNS Settings page and click on the Validate DNS button to validate the mapped DNS. You will get the ‘DNS Validated Successfully’ message if the DNS has been validated successfully. It may take some time to reflect the changes in DNS Registrar, so if any DNS entry mapping shows pending/failed, then click on the Revalidate button.
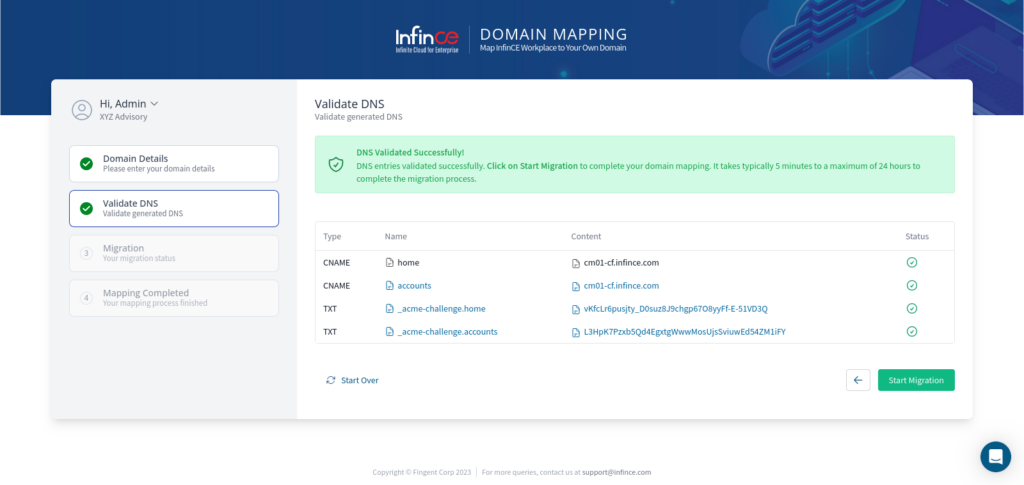
- Click on the Start Migration button to complete your domain mapping.
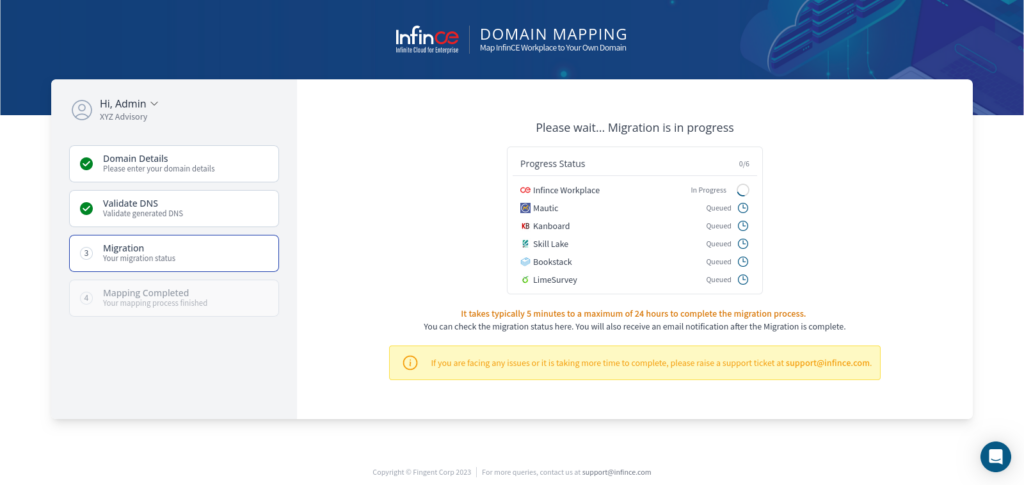
- Once the migration has started, you will be directed to the ‘Domain Migration’ page, where you can view the migration status of the Workplace and all the subscribed applications.
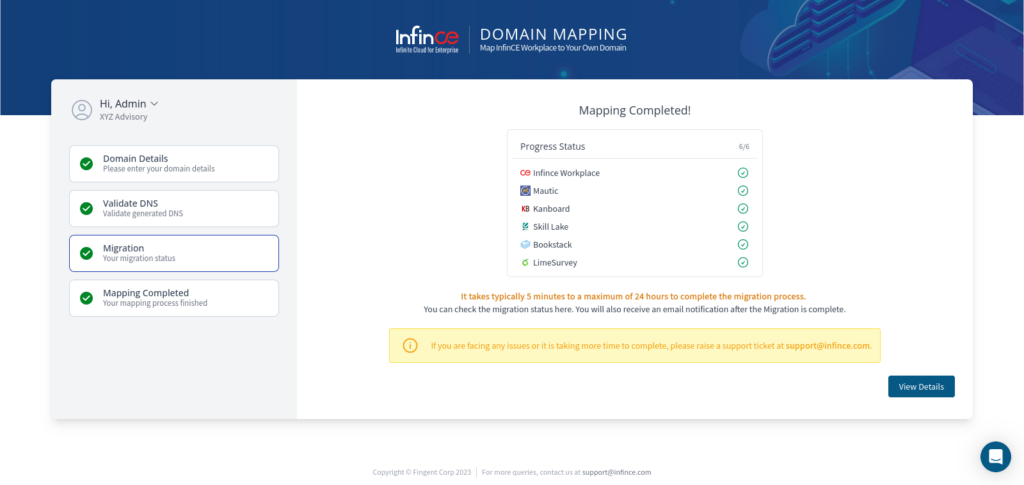
- When the Migration process gets completed, you can view the InfinCE workplace URL and SSO URL in the ‘Mapping Completed’ section.
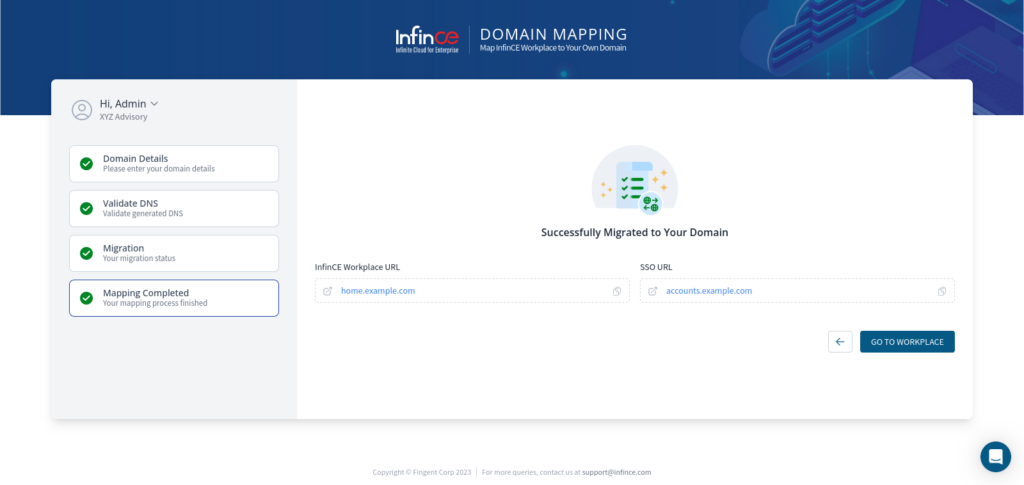
- You will also receive an email notification when the domain migration is complete. Click on the Go To Workplace button to navigate to the workplace.
Note:
- If you face any issues during the migration process or if the mapping is failed, please email us to the InfinCE support team at the earliest.
- Only the user who has initiated domain mapping can complete the process.
- After successful migration, you can view the domain mapping details (Administration > Settings > Domain Mapping) in the InfinCE workplace.
