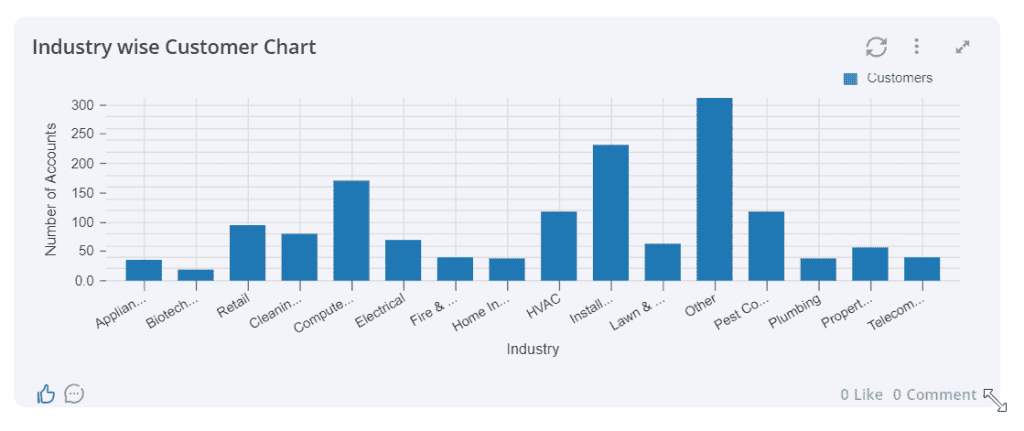
Dashboards are great tools for collaboration. A Dashboard is an information management tool that can visually track and analyze what is happening in the business. Dashboards can be set up for the Organization, Organizational Units, and Teams. Users can also keep Private dashboards for individual purposes. It is also a great tool for organizational communication and information sharing.
Tiles are the individual information snippets/cards that are the building blocks of the Dashboard. Users can often customize and arrange dashboard tiles based on their preferences, focusing on the most crucial information for their needs.
Creating a new Dashboard
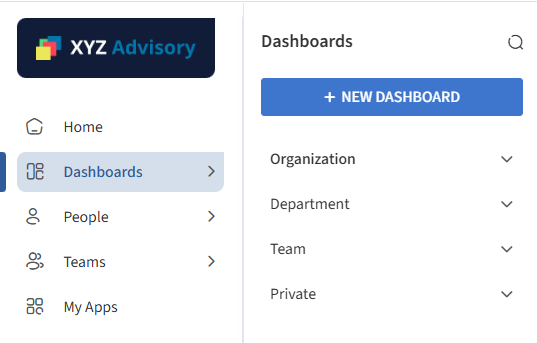
Click the Dashboards menu and the + New Dashboard button icon to create a new dashboard.
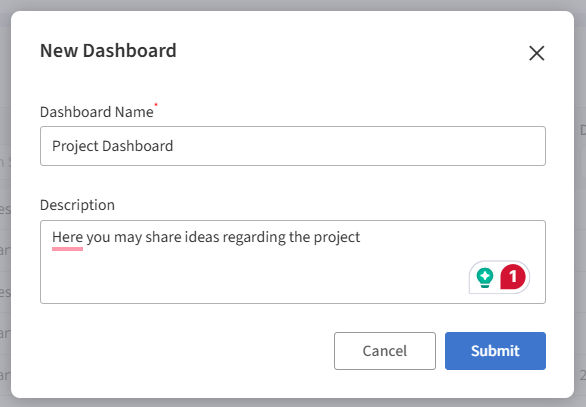
In the Create New Dashboard pop-up, enter the name and description of the dashboard and click the Submit button.
Creating a new Tile
Click on the +Add Tiles button to add tiles to the created dashboard.

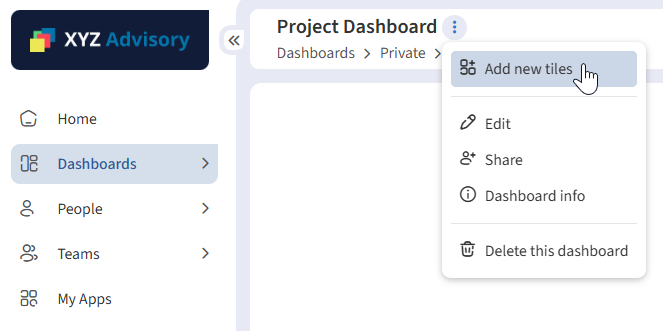
You may add tiles by clicking the three dots (kebab) icon and the Add new tiles option.
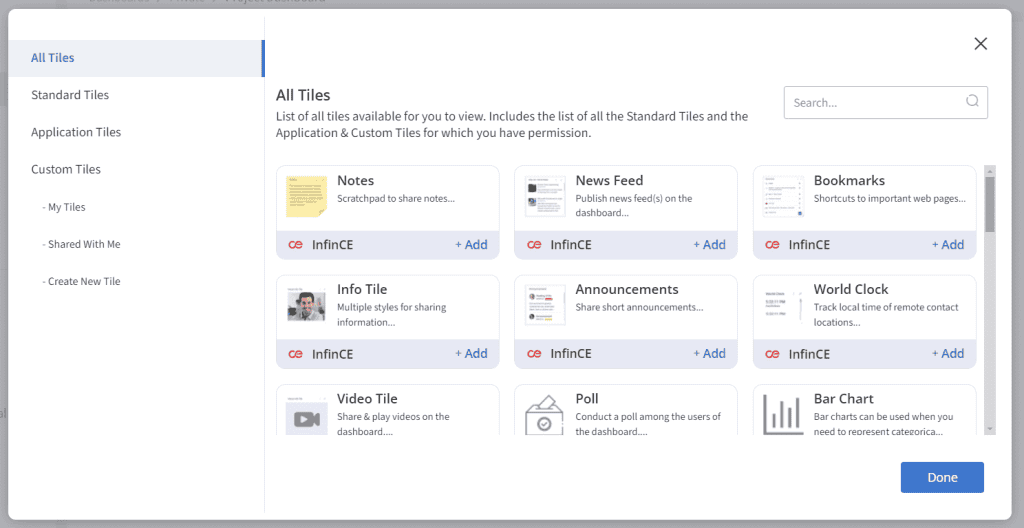
The All Tiles pop-up appears, where you may click on the +Add button on the required tiles to add the tile to the Dashboard. Click on the Done button to close the All Tiles pop-up.
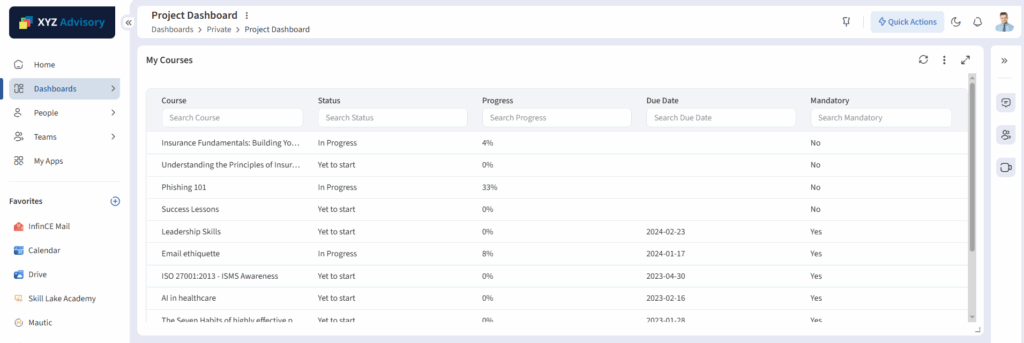
The added tile will be displayed on the Dashboard.
Renaming the tile
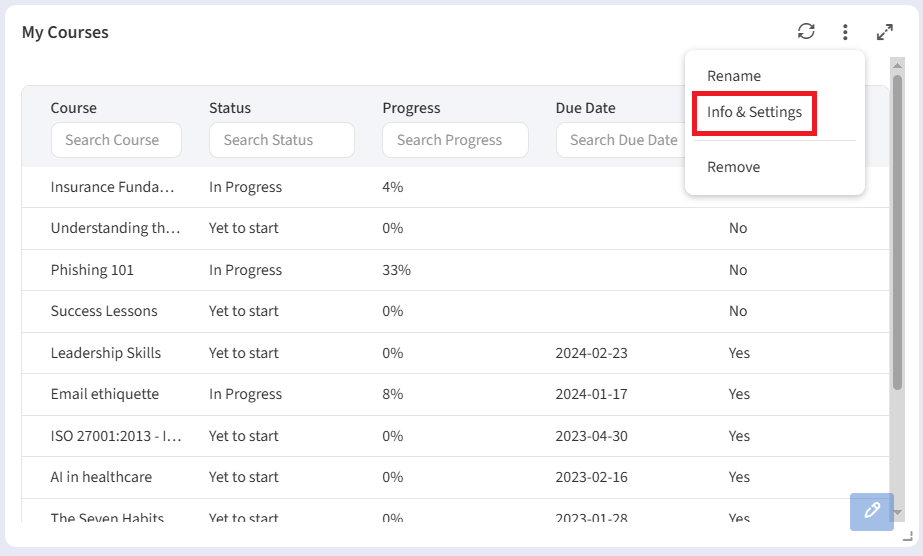
Click the three dots/Manage icon and the Rename option to rename the tile name. Click on the Submit button to save the changes made.
Removing the tile
Click the three dots/Manage icon and the Remove option to remove the tile. A confirmation message will appear, and you may click the ‘Yes’ button.
Tile Settings
Click the three dots/Manage icon and the Settings option to view the tile settings.
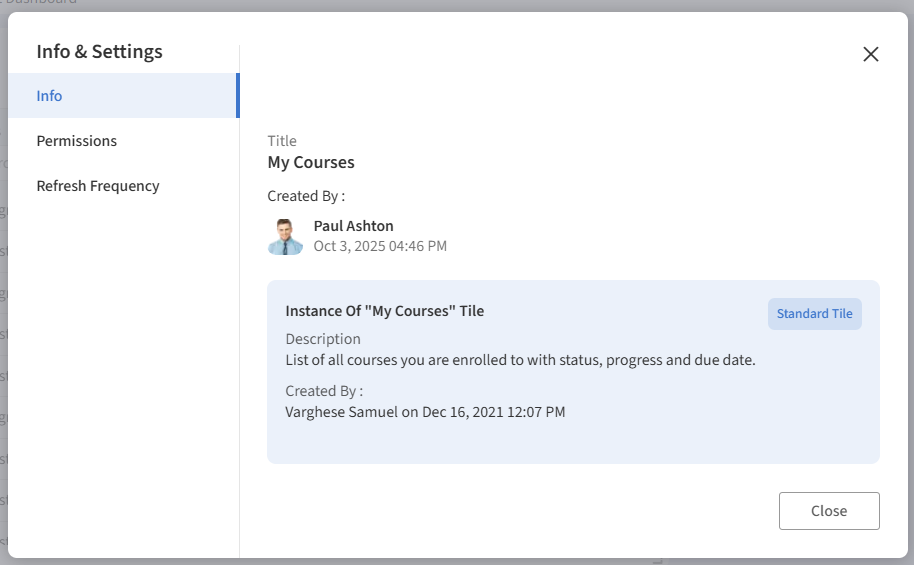
The Info tab displays the basic information of the tile, such as created by, description, etc.
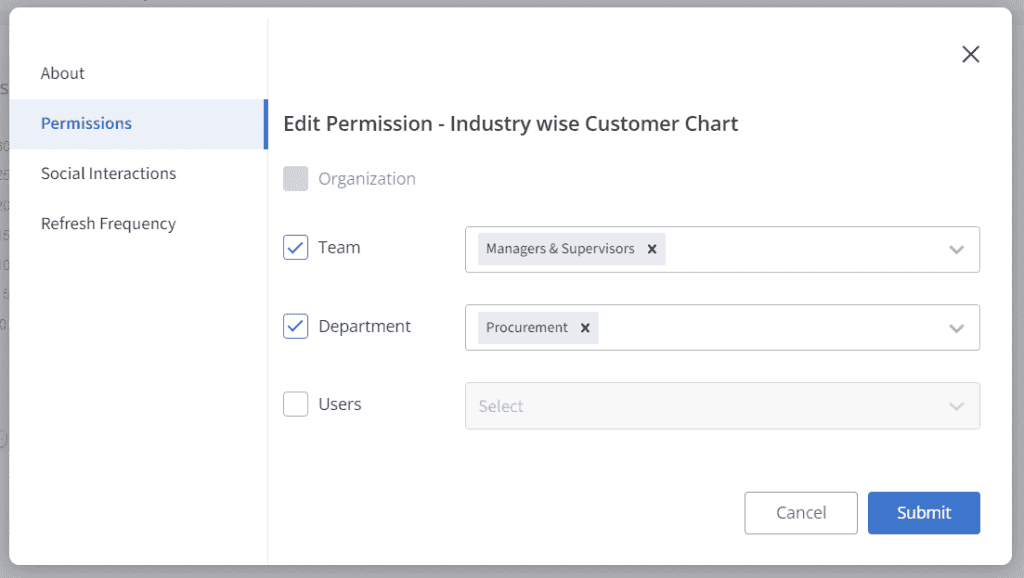
In the Permissions tab, you may provide Edit permissions for the tile to individual users or groups with access to this dashboard.
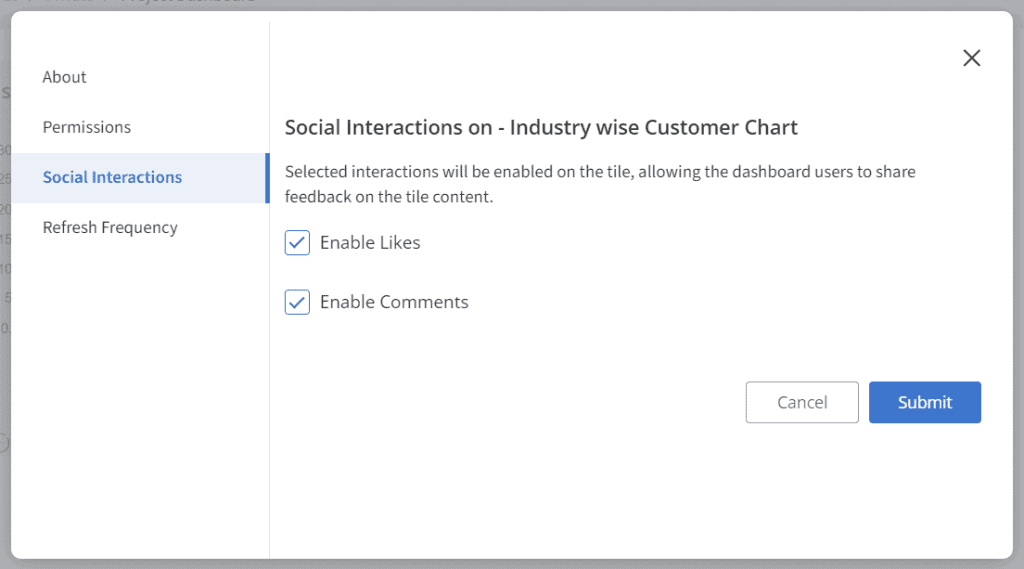
In the Social Interactions tab, enabling the Like and Comments feature for the tile is possible so the dashboard users can react to the tile content.
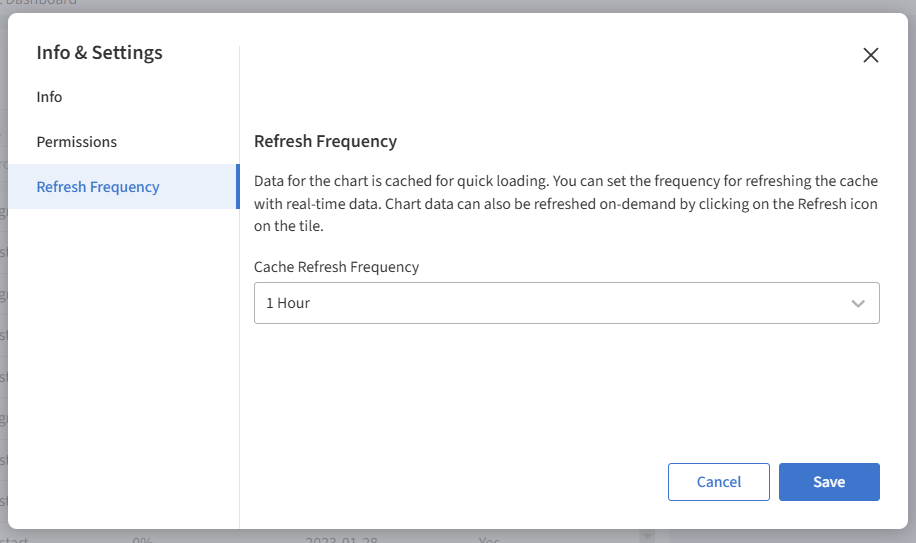
Refresh Frequency
This option is available only for Custom Tiles and lets you set the frequency for refreshing the cache with real-time data.
Sharing Dashboard
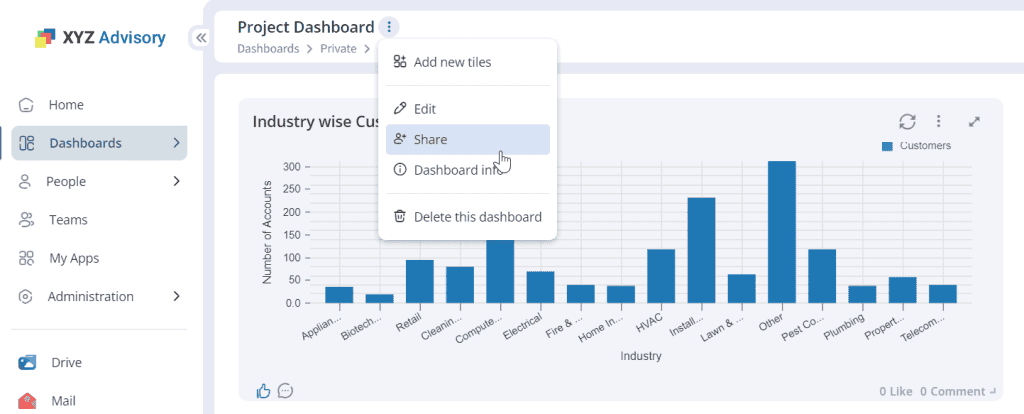
Click the Dashboard Settings icon (three dots icon) and the Share option to share the dashboard with the entire organization/selected groups.
- If the user is an Organizational Unit Member, they can share it with his OU. Tick the ‘Organization’ option and click on the Submit button to share the dashboard within the organization.
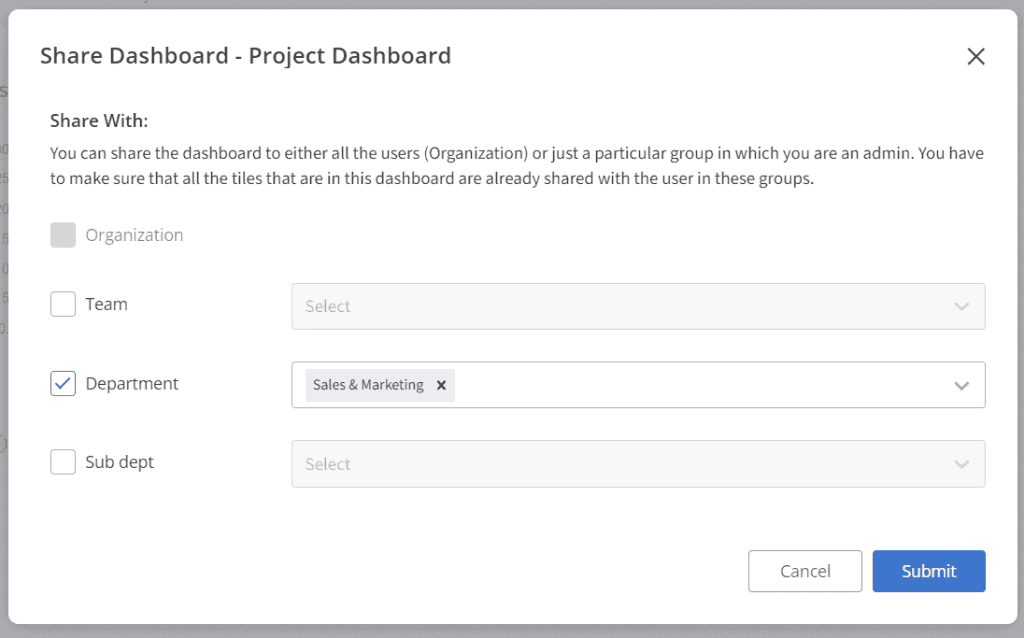
- If the user is a Team Admin, they can share it with his team. Tick the ‘Teams’ option, select the team from the drop-down, and click the Submit button to share the dashboard within a team.
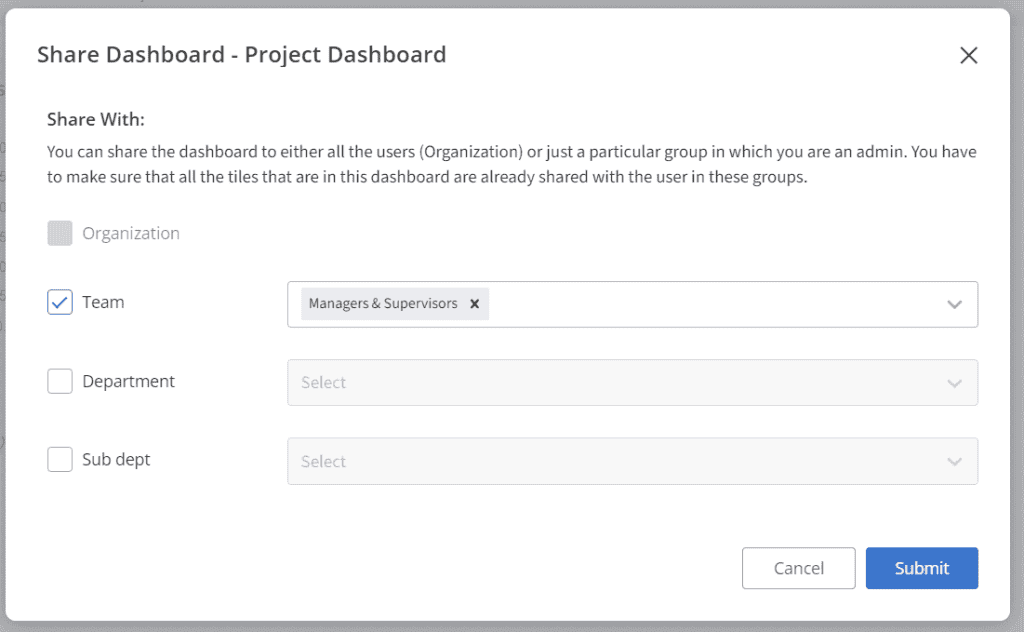
- If dashboard sharing is removed, then this dashboard will become a private dashboard and will not be accessible to anyone else except the user who created it.
Editing the Dashboard
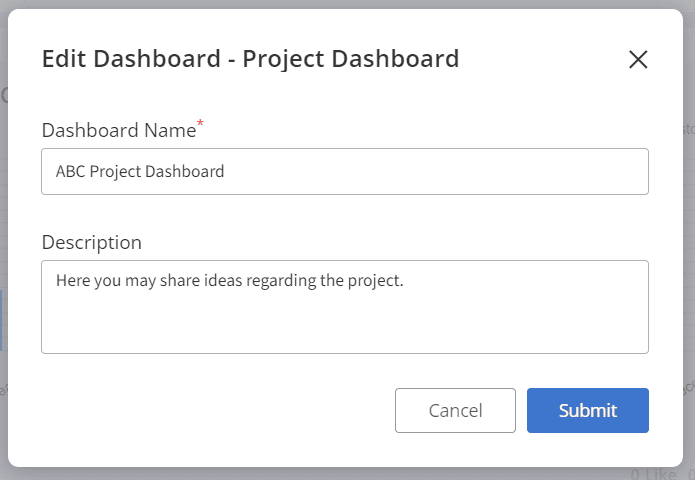
To edit the dashboard name or description, click the Dashboard Settings icon (three dots icon) and click the Edit option.
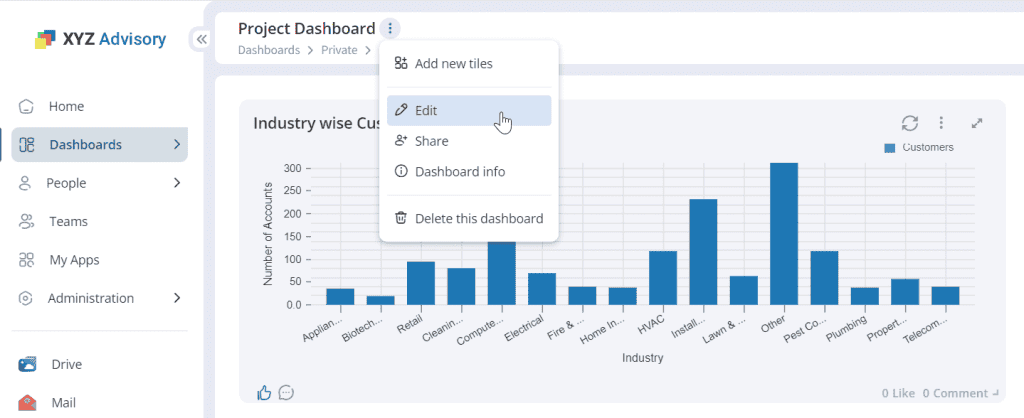
In the Edit Dashboard pop-up, edit the name and description of the dashboard.
Dashboard Info
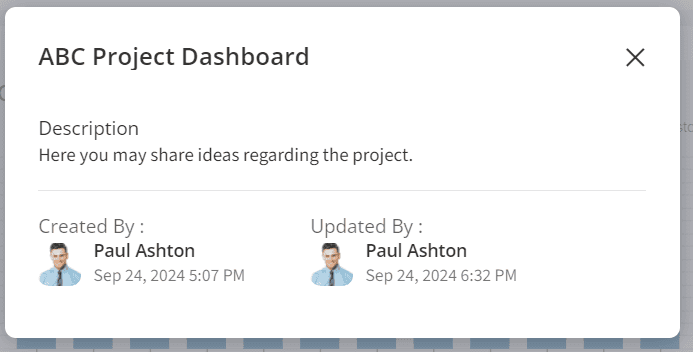
To view the Dashboard Info, click the Dashboard Settings icon (three dots icon) and the Dashboard Info option.
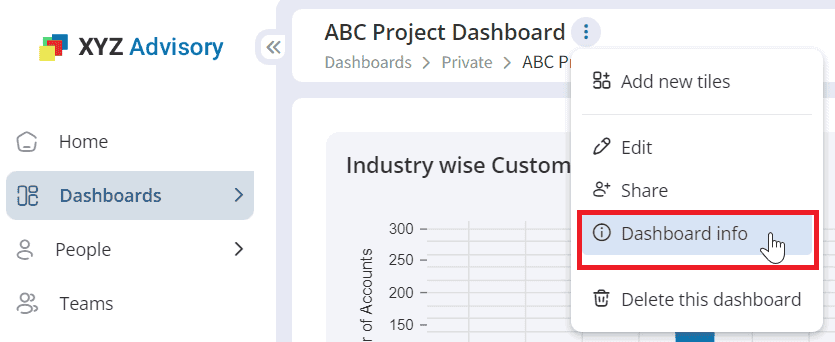
You may view the user who has created and shared the Dashboard.
Deleting the Dashboard
To delete the Dashboard, click the Dashboard Settings icon (three dots icon) and then the Delete this Dashboard option.
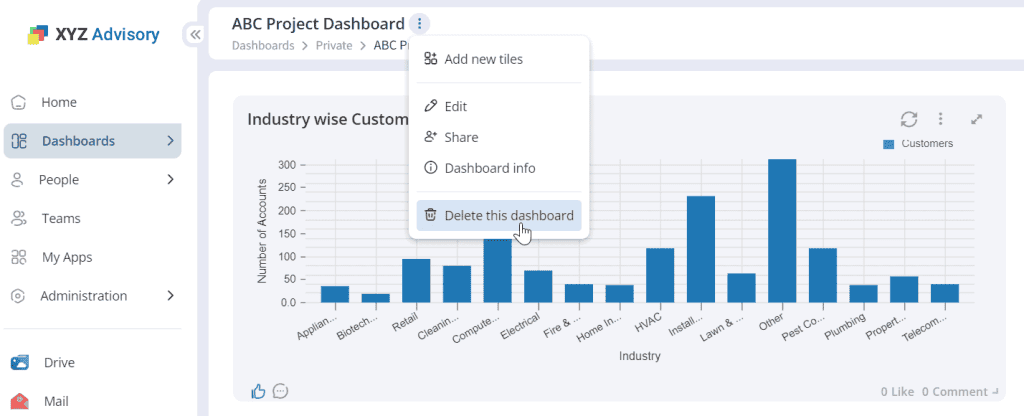
A confirmation message appears, where you may click on the Yes button to delete the Dashboard.
Resizing and rearranging the tiles
You can resize the tiles by clicking the arrow at the bottom of the tile.
You can rearrange the tiles by holding on to the tile header area and dragging them to the required space.
